
A mouthfull, but it is what it is. When looking through my stash for a nice build that I can complete before the nationals, I ended up with the Chevelle Wagon. I had idea’s that were mild custom, but then my eye landed upon a started ’67 Chevelle ProStreet kit and I was wondering if it would be doable to combine those 2 kits. Remarkably, it fits without too much hassle.
Idea’s popped up my mind and soon I had a theme for the project; Daddy’s ride. The Chevelle will be build both ProStreet chassis/engine wise and Custom on the body/interior.
I will finish this project with some items that makes it clear, this is daddy’s ride.
The colors were imagined quite quickly, I wanted red/red. I used Rosso Ferrari en Rubino Micalizzato, Both Ferrari OEM colors. First reaction of my wife; Those 2 colors don’t go together, you can’t do that. But most of you know, I do have my way around colors and I thought it would work out. So I went ahead and used those colors and also used it for the interior theme.
The box-art

And here I started with making my own Outlaw-hood. I found a few resin hoods, but I didn’t like the look of those, so I decided to make my own.

I cut out the original SS ‘intakes’, maybe I can use it for a future project.

And glued the outlaw part on the hood.

Time to sand and sand and sand

Due to the prostreet character, I wanted a race gastank in the boot, I made it from styrene sheet. here is the template I made
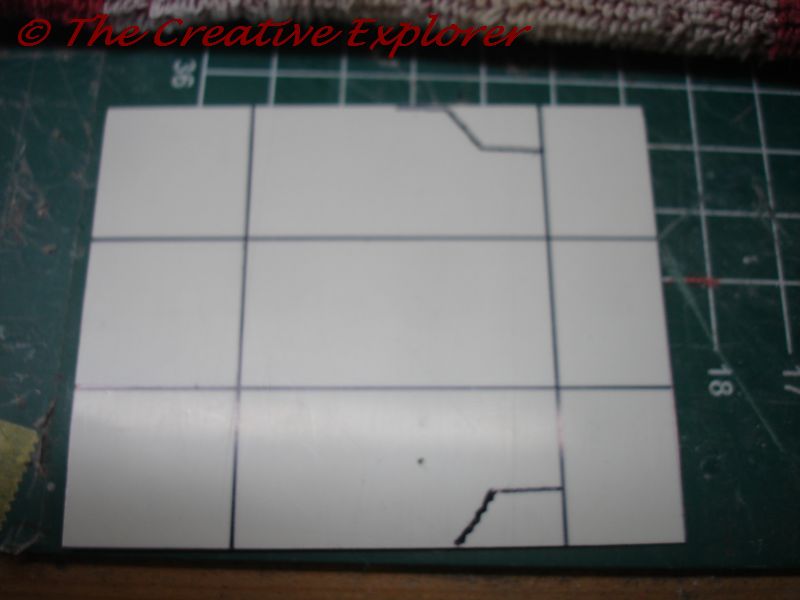
Cut it out…

And glued it together. I made it a little too big, so I will shorten it a little

I also modified the springs of the hood. I removed the molded in springs and replaced it with real springs

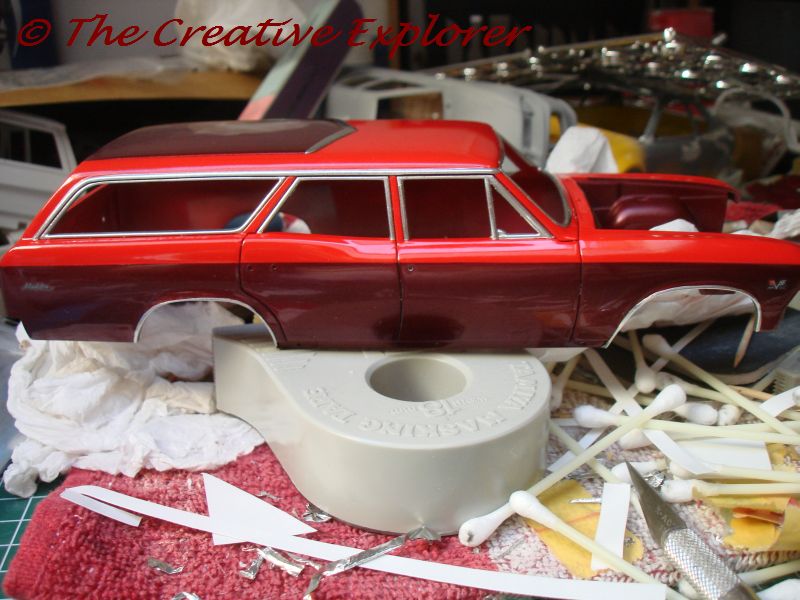
And the first picture of the colors of the car. I am working here on the BMF.

The engine so far

And the lower part of the dash

Still working on the BMF, it really worked against me on this project.

I added a little extra BMF on the roof, made it to resemble the Chevy-logo a little.

The chassis that I will be using for this project. Since the wheeltubs will be visible, I painted them too.

Almost done with BMF

And finally done. Finally!
The rear-seat will be installed and also used.

The smaller gas-tank

And a little addition for on the rear-seat, anyone a idea what this end up being?

Another addition

And I worked a little bit more on the back-end.

Work progressed and I am working mostly on the mechanical parts.
I worked a bit more on the engine, added pulley’s and some PE


After installing the exhaust’s, I thought it would be a nice touch to add some heat-shields, I made them from aluminium


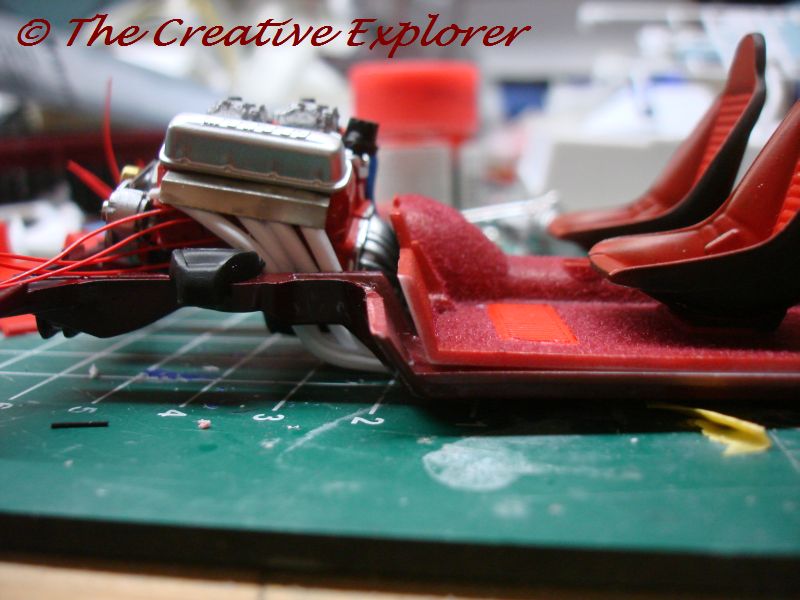
A dryfit with the interior, The gearbox is too high and the engine sits too high on the front-mounts, 2 issues that needs to be adressed.

A better view with this picture.
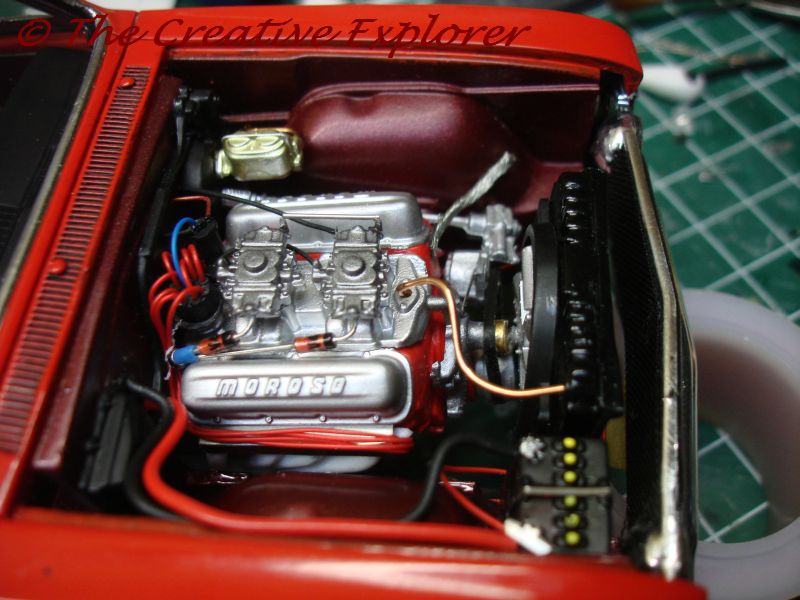
the engine got his place on the chassis, it still needs detailling, but that will come later.


I also started on the rear-axle

And the headliner is finished, it is two-tone, a bit hard to see in this picture

But better in this one.

And work continued, even though the major parts were done, it is time-consuming in finishing a build.
I put some BMF on the sidepanels, here is a before and after shot:

The finished and seatbelted babyseat

I scratched a seatbelt-clicker…

That I put on the rear-couch and will hold the baby-seat in place…


Like so..


Because Daddy also get’s the car to the strip, he needed a roll-cage, but it couldn’t be too big for his daily driver. So I made this one by widened it 1cm in width, and sand it smooth

I handpainted the tires to give it a bit more beefier look

And finished the gastank, which is basically done, it just needs some wires for the gas-gauge.


I flocked some parts of the hood, to give it that sound-proofing material look

The steering column got detailed by a metal pin, replacing the molded signal-beam

The shocks were also modified, by cutting it in 3 pieces, replacing the middle piece by a piece of tubing and add some wires for springs. The white part is the original ‘middle’-piece


I finished seatbelting the interior, it does needs some tweaking, but it is basically done

For the baby I added some static-cling zoo-animals, as seen on 70’s and 80’s cars. (at least over here in Europe, they were a big hit)

It needs to be known that this is no soccer-mom’s car, so Daddy put his mark on it. Note also the Baby on board to the right of it.

The front got its lights and grille darkened

And the finished rear-axle.

This kit has been wonderful to work on so far, the fit is really well. Especially when considering I am kitbashing 2 kits. There are a lot of possibilities to upgrade the detailling and altogether it comes out quite nice.
It is starting to come all together, the interior tub was put together, so I could finish up the last details in the car.

I flocked the (Fujimi) teddy-bear, to give it a bit more realistic appearance


It also needed a face, I manage to do that with a sharpie-pen

The teddy-bear is now making sure the baby is safe during a wild ride ![]()

I added the carburetor-linkage, but that was a huge pain in the butt!. It is barely noticable on the picture, but there is a hair-thin wire running from the first carb-linkage to the black cable, quite frustrating!


The front end was installed and now it starts to look like a Chevelle!

I also made a antenna out of a watch-part and acupuncture needle.

I think it looks convincing!


I added the brake-cylinder with the brakelines

Instead of using the kit-hoses, I wanted to replace them. I found some tubing, but it was hollow and didn’t stay contoured, so I stuck some copperwire in the tube and now it works with me, rather then against me

First I made a mold with just the copperwire…
…and then put the tubing on the wire and glued it in place.

It is the final countdown…..I mean Update ![]()
Basically all the work is done, the last little tidious things were quickly done. Most challenging was the inlet-scoop. The ProStreet kit was with 2 separate funnels, but the look didn’t appeal to me. So I decided to find something different. Which was harder then I thought. I went through my spareparts over and over, until I finally found something, a supercharger scoop of an old (AMT?) engine. It was poorly detailled and in not so good shape. First I opened the opening on the front, than I sanded it down, until it fit underneath the hood and filled the seams and scratches with filler. I then sprayed it in gloss black and added a little pinstripe, just because. I think the outcome does match the car and fits nicely.
I added photo-etch windshield wipers.

And the hoodscoop finished and in place.

At this point I thought I was actually done, it took me to today to realise I forgot 2 things:
The side-mirror….

….And the exhaust, which also needed a little bit of modification.

…which can be seen here, between the exhaust manifold and the rear-piece. I had to place a little bit in between, otherwise there would’ve been a 3mm gap.

Does look sweet
